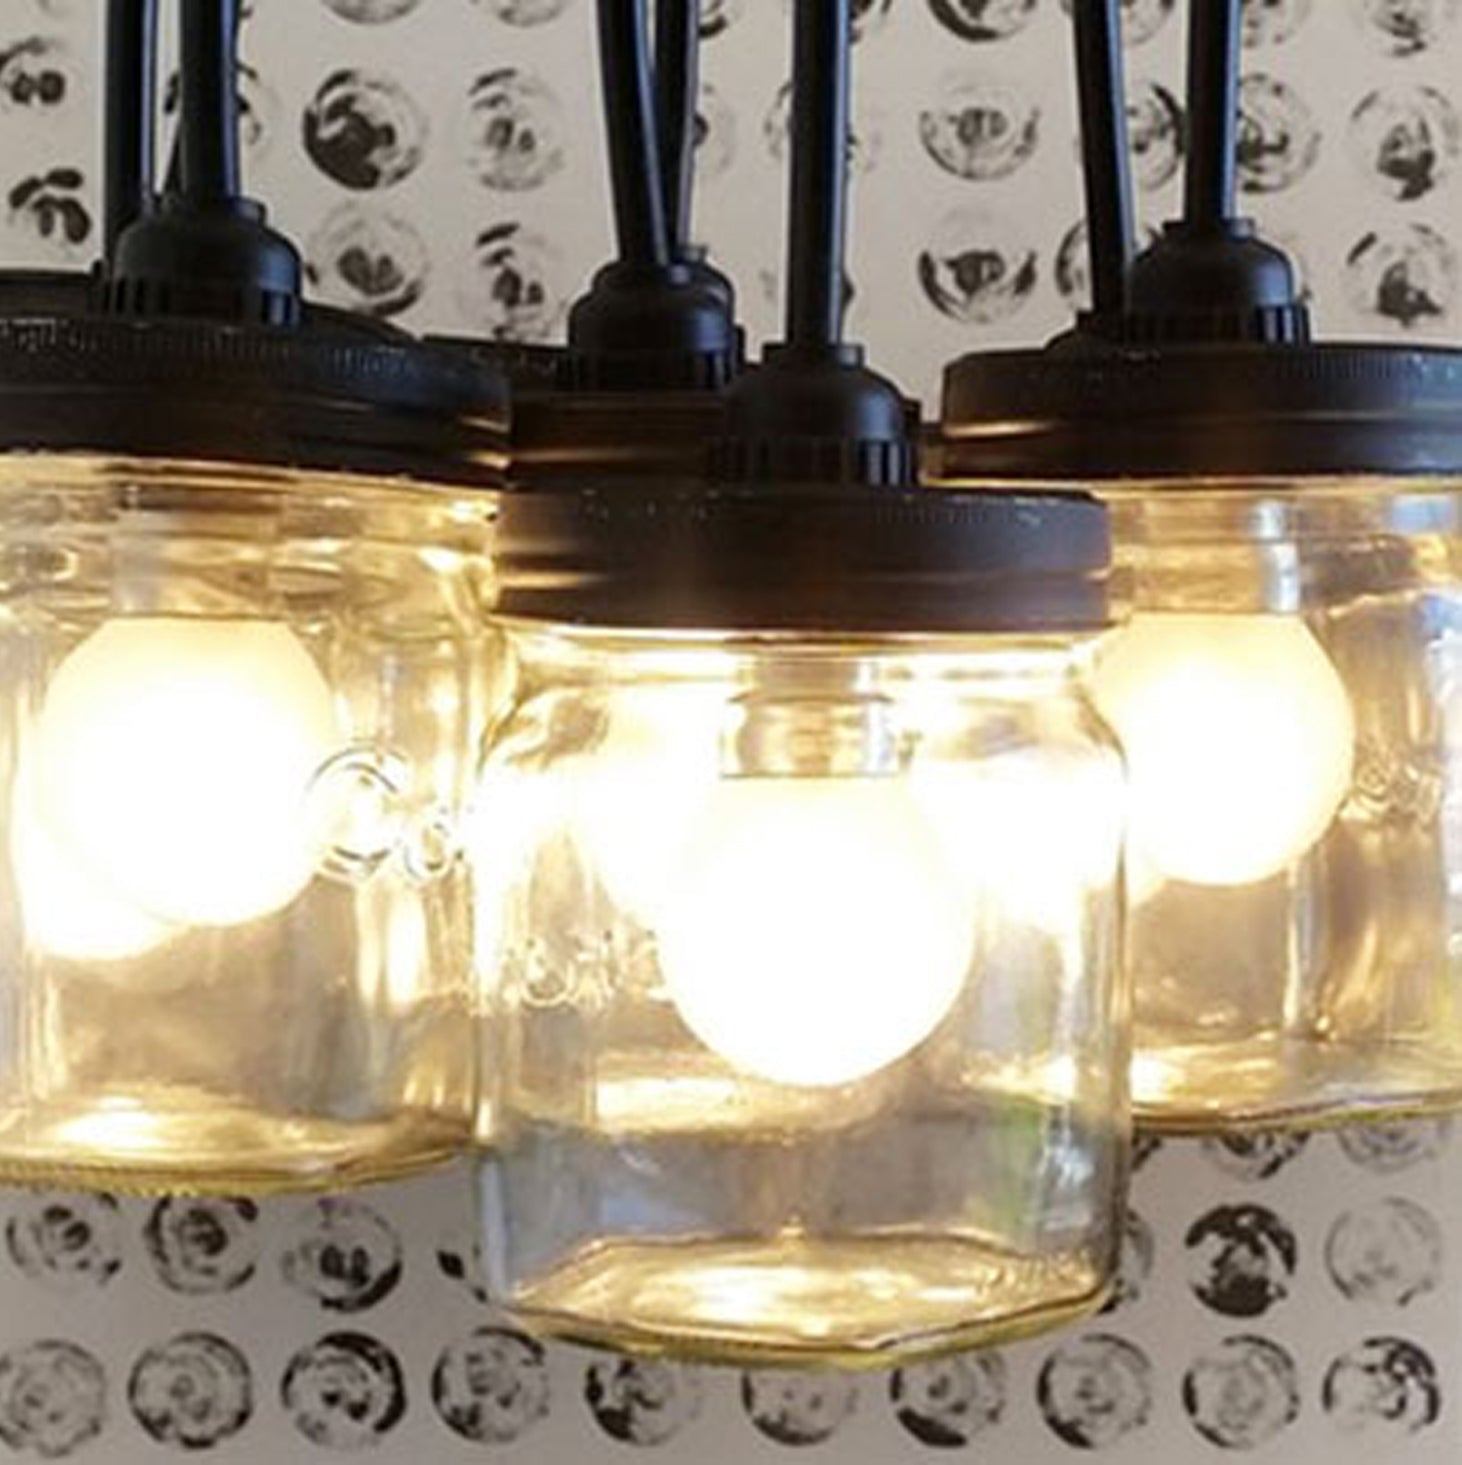
DIY CHANDELIER – The Consol Shop Cornubia

HOW-TO GUIDES MAKE THE MOST OF OUR PRODUCT RANGE

{"id":394239901848,"title":"DIY CHANDELIER","created_at":"2021-02-15T14:03:48+02:00","body_html":"\u003cstrong\u003ePLEASE KEEP IN MIND THAT IT IS ESSENTIAL TO GET A QUALIFIED ELECTRICIAN TO DO THE WIRING ON THIS PROJECT.\u003c\/strong\u003e\u003cbr\u003e\n\u003cp\u003e\u003cbr\u003e\u003cstrong\u003eMaterials Needed: \u003c\/strong\u003e\u003c\/p\u003e\n\u003cp\u003e8 \u003cspan style=\"text-decoration: underline;\"\u003e\u003ca href=\"https:\/\/consolglass.myshopify.com\/products\/consol-glass-preserve-jar-500ml-with-ring-dome-1\"\u003eConsol Glass Preserve Jar 500ml\u003c\/a\u003e\u003c\/span\u003e\u003cbr\u003e8 1.1m 2.5 Cabtyre electrical cord in black\u003cbr\u003eMatt black spray paint\u003cbr\u003e8 black light fittings\u003cbr\u003e8 golf ball lamps\u003cbr\u003eElectrical series connectors\u003cbr\u003eLarge ceiling bolt with plug\u003cbr\u003e8 small metal bucket to use as a ceiling cup\u003cbr\u003eHook with nut (length to match the height of your little bucket)\u003cbr\u003eHole saw to match the diameter of your light fittings\u003c\/p\u003e\n\u003cp\u003e\u003cbr\u003eThe light should hang around 80cm above the table, so in this specific dining room, the total length of the chandelier will be 1m. Add 10cm to each cord to give you some room to play with.\u003c\/p\u003e\n\u003cp\u003e\u003cstrong\u003eInstructions:\u003c\/strong\u003e\n\u003c\/p\u003e\u003col class=\"lighting_guide\"\u003e\n\u003cli\u003eCarefully mark out the centre of each lid and drill a hole using the hole saw. Use pliers to press down any rough edges and to slightly adjust the size of the hole if necessary – it has to fit the light fitting snugly.\u003c\/li\u003e\n\u003cli\u003eSpray the lids and allow to dry.\u003c\/li\u003e\n\u003cli\u003eWire a piece of cord to each light fitting.\u003c\/li\u003e\n\u003cli\u003eMake 8 equally spaced markings on the bottom of the little bucket and drill holes for the cords to go through.\u003c\/li\u003e\n\u003cli\u003eDrill a single hole in the center of the bucket and attach the metal eye, securing the nut underneath.\u003c\/li\u003e\n\u003cli\u003eSpray the buckets and allow to dry.\u003c\/li\u003e\n\u003cli\u003eThread the cords through the holes and get the electrician to connect them to each other so that you end up with a single cord to connect to the power point in the ceiling.\u003c\/li\u003e\n\u003cli\u003eAttach the hook to the ceiling, connect and hook your chandelier in place.\u003c\/li\u003e\n\u003cli\u003eSwitch on, and admire your work! Happy lighting!\u003c\/li\u003e\n\u003c\/ol\u003e\n\u003cbr\u003e\n\u003cp\u003eThe above DIY was created by Germarie Bruwer (Homeology) and repurposed for Consol. View original article \u003ca href=\"https:\/\/www.homeology.co.za\/chandelier-diy-consol-glass-massive-sale\/\"\u003e\u003cspan style=\"text-decoration: underline;\"\u003ehere\u003c\/span\u003e.\u003c\/a\u003e\u003c\/p\u003e","blog_id":75428823192,"author":"Duncan Colville","user_id":60400533656,"published_at":"2021-03-01T16:31:34+02:00","updated_at":"2021-03-03T14:32:24+02:00","summary_html":"","template_suffix":"","handle":"diy-chandelier","tags":"","image":{"created_at":"2021-02-26T15:20:58+02:00","alt":"","width":1462,"height":1465,"src":"\/\/cornubia.consolshop.co.za\/cdn\/shop\/articles\/dyn.jpg?v=1614345658"}}

DIY CHANDELIER

PLEASE KEEP IN MIND THAT IT IS ESSENTIAL TO GET A QUALIFIED ELECTRICIAN TO DO THE WIRING ON THIS PROJECT.


Materials Needed: 

8 Consol Glass Preserve Jar 500ml
8 1.1m 2.5 Cabtyre electrical cord in black
Matt black spray paint
8 black light fittings
8 golf ball lamps
Electrical series connectors
Large ceiling bolt with plug
8 small metal bucket to use as a ceiling cup
Hook with nut (length to match the height of your little bucket)
Hole saw to match the diameter of your light fittings


The light should hang around 80cm above the table, so in this specific dining room, the total length of the chandelier will be 1m. Add 10cm to each cord to give you some room to play with.

Instructions:

  1. Carefully mark out the centre of each lid and drill a hole using the hole saw. Use pliers to press down any rough edges and to slightly adjust the size of the hole if necessary – it has to fit the light fitting snugly.
  2. Spray the lids and allow to dry.
  3. Wire a piece of cord to each light fitting.
  4. Make 8 equally spaced markings on the bottom of the little bucket and drill holes for the cords to go through.
  5. Drill a single hole in the center of the bucket and attach the metal eye, securing the nut underneath.
  6. Spray the buckets and allow to dry.
  7. Thread the cords through the holes and get the electrician to connect them to each other so that you end up with a single cord to connect to the power point in the ceiling.
  8. Attach the hook to the ceiling, connect and hook your chandelier in place.
  9. Switch on, and admire your work! Happy lighting!

The above DIY was created by Germarie Bruwer (Homeology) and repurposed for Consol. View original article here.